Wednesday, December 18, 2013

Just Add Snow... Snowman Kits to DIY


I have seen these kits in catalogs and knew I could make it myself.  In fact I decided this would be a great project to make for the grand kids and great nieces/nephews this Christmas.  Here's a step by step of how I DIM (did it myself).
Supply List:
Wooden closet rod or large dowel about 12 inches in length
Wooden drawer pulls, 3 round (buttons) and 2 square (eyes)
1/4 " dowel
Wood glue
Drill with 1/4" bit
Saws; miter and band
Assorted paint; black for eyes and mouth, orange for carrot nose, red & green for buttons
Spray shellac if not using outdoor paint
Time

Optional Supplies:
Scarf 
Hat
Bag to hold kit

Step 1
With a miter saw cut the closet rod into five 1/2 inch pieces for the mouth.  Use the remaining length of closet rod to shape a carrot nose with the band saw (or whittle it).  
Step 2
Cut eleven 3 inch lengths from the 1/4 inch dowel.
Step 3
Using a quarter inch drill bit, drill holes into the back of each mouth, nose, eye and button pieces.  Drill about 3/8 inch down but not through the wood.   Glue dowel cuts with wood glue to each piece. 

Step 4
Paint the pieces and let dry.
Step 5
Add button holes with your black paint.  Let dry.  I tried using white paint to make the buttons look like they had thread but did not like this look so I painted over them.


Step 6
After the pieces are all dry, coat them with shellac for durability in the wet snow.


If you want to go a step further, make a drawstring bag to place all the pieces in.  I used white fabric to make the bag and ironed on a design using this cute label I made.  I printed it on iron-on transfer paper that I purchase at JoAnn's.


I hope the kids have many years of fun snowman building.

Saturday, December 14, 2013

Rice is Not Just for Eating! Bed Buddy Tutorial


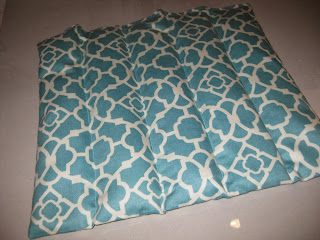
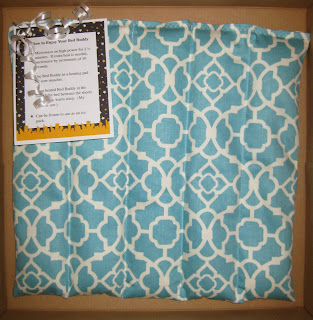
Baby it's cold outside!  With all the snow and bad roads it's been easy to tackle projects that have been on my plate.  This one is just the ticket for a last minute gift or something to keep you and your family toasty warm,  rice heating bags or as I like to call them, Bed Buddies.  So simple to make and just a few ingredients;  fabric, thread, sewing machine and rice.

1.  Start with a medium weight fabric cut in a 15" x 27 " rectangle.  (You could also use a hand towel.)


2.  Fold the fabric in half wrong side out.


3.  Sew the right and left sides closed with a quarter inch seam allowance.  Stitch again for extra strength.  Turn right side out and press.  Press under 1/2 inch on open edge.


4.  Mark off from the fold to the open edge five row.  Each should be close to equal in width, approximately 2 7/8 inches wide if you started with a 15 inch wide piece of fabric minus the two 1/4 inch seams.  To find the exact measurement you can measure between your sewn edges, multiply by 5 and you get your row width.  Place pins at the top of each row.  You can draw a line with chalk, pin or eyeball your sewing line.


5.  Starting at the top using a straight stitch, sew from top to bottom to make your 5 rows, be sure to backstitch at the beginning and end to secure threads.  Hard to see in this photo because my thread blends in with the fabric pattern.


6.  Now the fun part.  Pour rice into each row about 2/3 full, approximately 1 1/4 cups of rice.  I do this over a pan and had my husband hold open the bag while I carefully poured.  I tried using a funnel, but the one I had, had too narrow of a neck opening for the rice to go down smoothly.


7.  Pin and sew the top opening closed.  I like to use a zig zag stitch and a straight stitch so that no rice can escape.


Almost finished but one more step... the heating instructions.

8.  Download the attached tags and print off if making a gift.  Bed Buddy Label

I like to print on cardstock and pin with a ribbon before wrapping up to gift.  If you don't want to use the tags the instructions are to microwave for 2 1/2 minutes and increase in increments of 30 seconds if you need it hotter.  Can also be frozen and used as an ice bag.  Do not wash as this will cause the rice to become moist and spoil.


My favorite use for this bag is to warm up at bedtime, place between the sheets at the foot of the bed for a toasty warm sleep. 

Enjoy and let me know how your project turned out.